Item - Purchasing Tab
Items > Item Management > (Select Item) > Purchasing
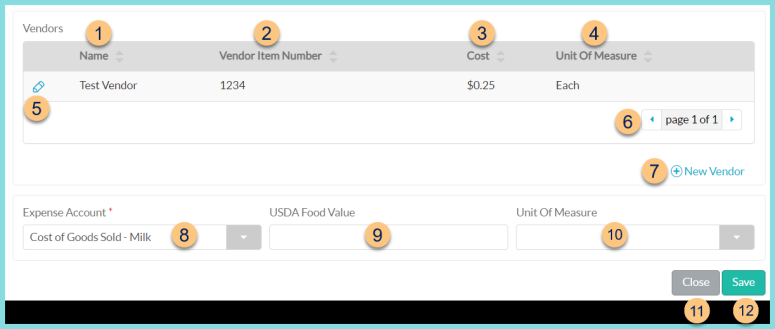
This tab is available on items with the Inventory and Purchased attributes.
-
Name - click to sort by vendor name
-
Vendor Item Number - click to sort by vendor item number
-
Cost - click to sort by cost
-
Unit of Measure - click to sort by unit of measure
-
Pencil - click to edit pricing details
-
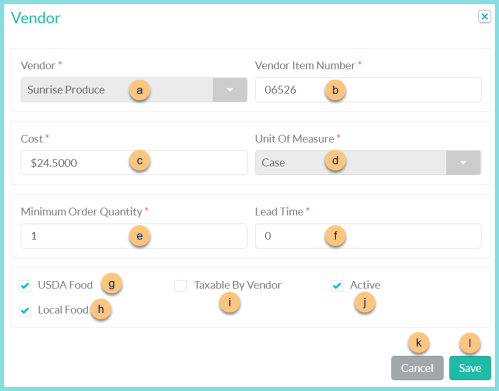
Vendor - notice vendor
-
Vendor Item Number - enter Vendor Item Number
-
Cost - enter vendor Cost
-
Unit Of Measure - notice the Purchasing Unit of Measure
-
Minimum Order Quantity - enter the minimum order quantity if needed (Default: 1)
-
Lead Time - indicate a lead time in days if applicable (Default: 0)
-
USDA Food - check to indicate that the USDA Food Value (Step 9) is applicable to this vendor record
-
Local Food - check to indicate that this item is local by default when received from this vendor
-
Taxable By Vendor - check if Sales Tax is charged for this item upon receipt from this vendor
-
Active - toggle active status; Note: once inactivated, this vendor record will not be recoverable
-
Cancel - click to return to the previous screen without saving changes
-
Save - click to save changes
-
< > - click to scroll through pages
-
(+) New Vendor - click to add a new vendor price
-
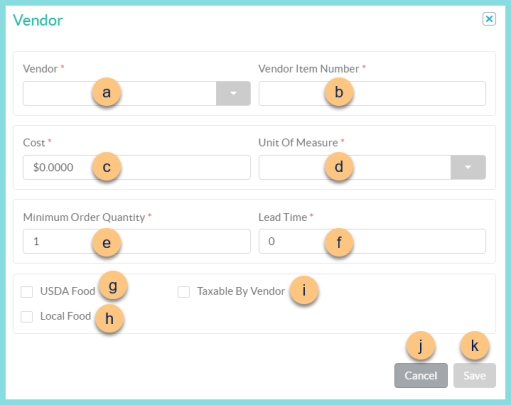
Vendor - select vendor
-
Vendor Item Number - enter Vendor Item Number
-
Cost - enter vendor Cost
-
Unit Of Measure - select the Purchasing Unit of Measure
-
Minimum Order Quantity - enter the minimum order quantity if needed (Default: 1)
-
Lead Time - indicate a lead time in days if applicable (Default: 0)
-
USDA Food - check to indicate that the USDA Food Value (Step 9) is applicable to this vendor record
-
Local Food - check to indicate that this item is local by default when received from this vendor
-
Taxable By Vendor - check if Sales Tax is charged for this item upon receipt from this vendor
-
Cancel - click to return to the previous screen without saving changes
-
Save - click to save changes
-
Expense Account - select expense account
-
USDA Food Value - enter the USDA Food Value for the item if applicable
-
Unit of Measure - select the Unit of Measure for the USDA Food Value if applicable
-
Close - click to return to the Item Management screen without saving changes
-
Save - click to save changes